Installation
On windows
Enable the WSL 2 feature on Windows
Open PowerShell or Windows Command Prompt in administrator mode by right-clicking and selecting "Run as administrator". Enter the wsl --install command, then restart your machine.
wsl --install
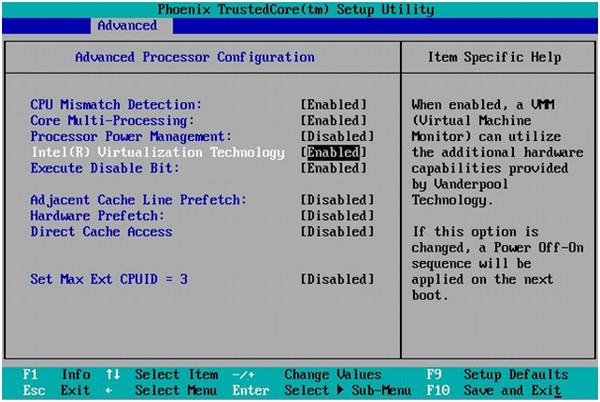
BIOS-level hardware virtualization support must be enabled in the BIOS settings.
Install docker desktop (Click here)

Launch Docker Desktop

On Linux(Ubuntu)
Update existing packages
sudo apt update
Next, install a few prerequisite packages which let apt use packages over HTTPS:
sudo apt install apt-transport-https ca-certificates curl software-properties-common
Then add the GPG key for the official Docker repository to your system:
curl -fsSL https://download.docker.com/linux/ubuntu/gpg | sudo apt-key add -
Add the Docker repository to APT sources:
sudo add-apt-repository "deb [arch=amd64] https://download.docker.com/linux/ubuntu focal stable"
Finally, install Docker:
sudo apt install docker-ce
Docker should now be installed, the daemon started, and the process enabled to start on boot. Check that it’s running:
sudo systemctl status docker
If you want to avoid typing sudo whenever you run the docker command, add your username to the docker group:
sudo usermod -aG docker ${USER}
su - ${USER}
su - ${USER}
Virtual Machines
Let's say we have an old Python application running on a Linux distribution (such as Alpine), and we want to run the same application on a Windows machine. One approach would be to install the application and all of its dependencies on Windows. However, if our application has a large number of dependencies and relies on third-party apps, this could become a cumbersome and time-consuming task.
Is there a more efficient way to run our application on Windows?
Another option is to use virtual machine (VM) images that contain our application along with all the necessary software and operating system. By using this method, we can simply install the VM image on our computer using VM tools like Virtual Box or VMWare. This can simplify the deployment process and ensure consistency across different environments.
What is Virtual Machine ?
"Virtualization is the process in which a system singular resource like RAM, CPU, Disk, or Networking can be ‘virtualized’ and represented as multiple resources."
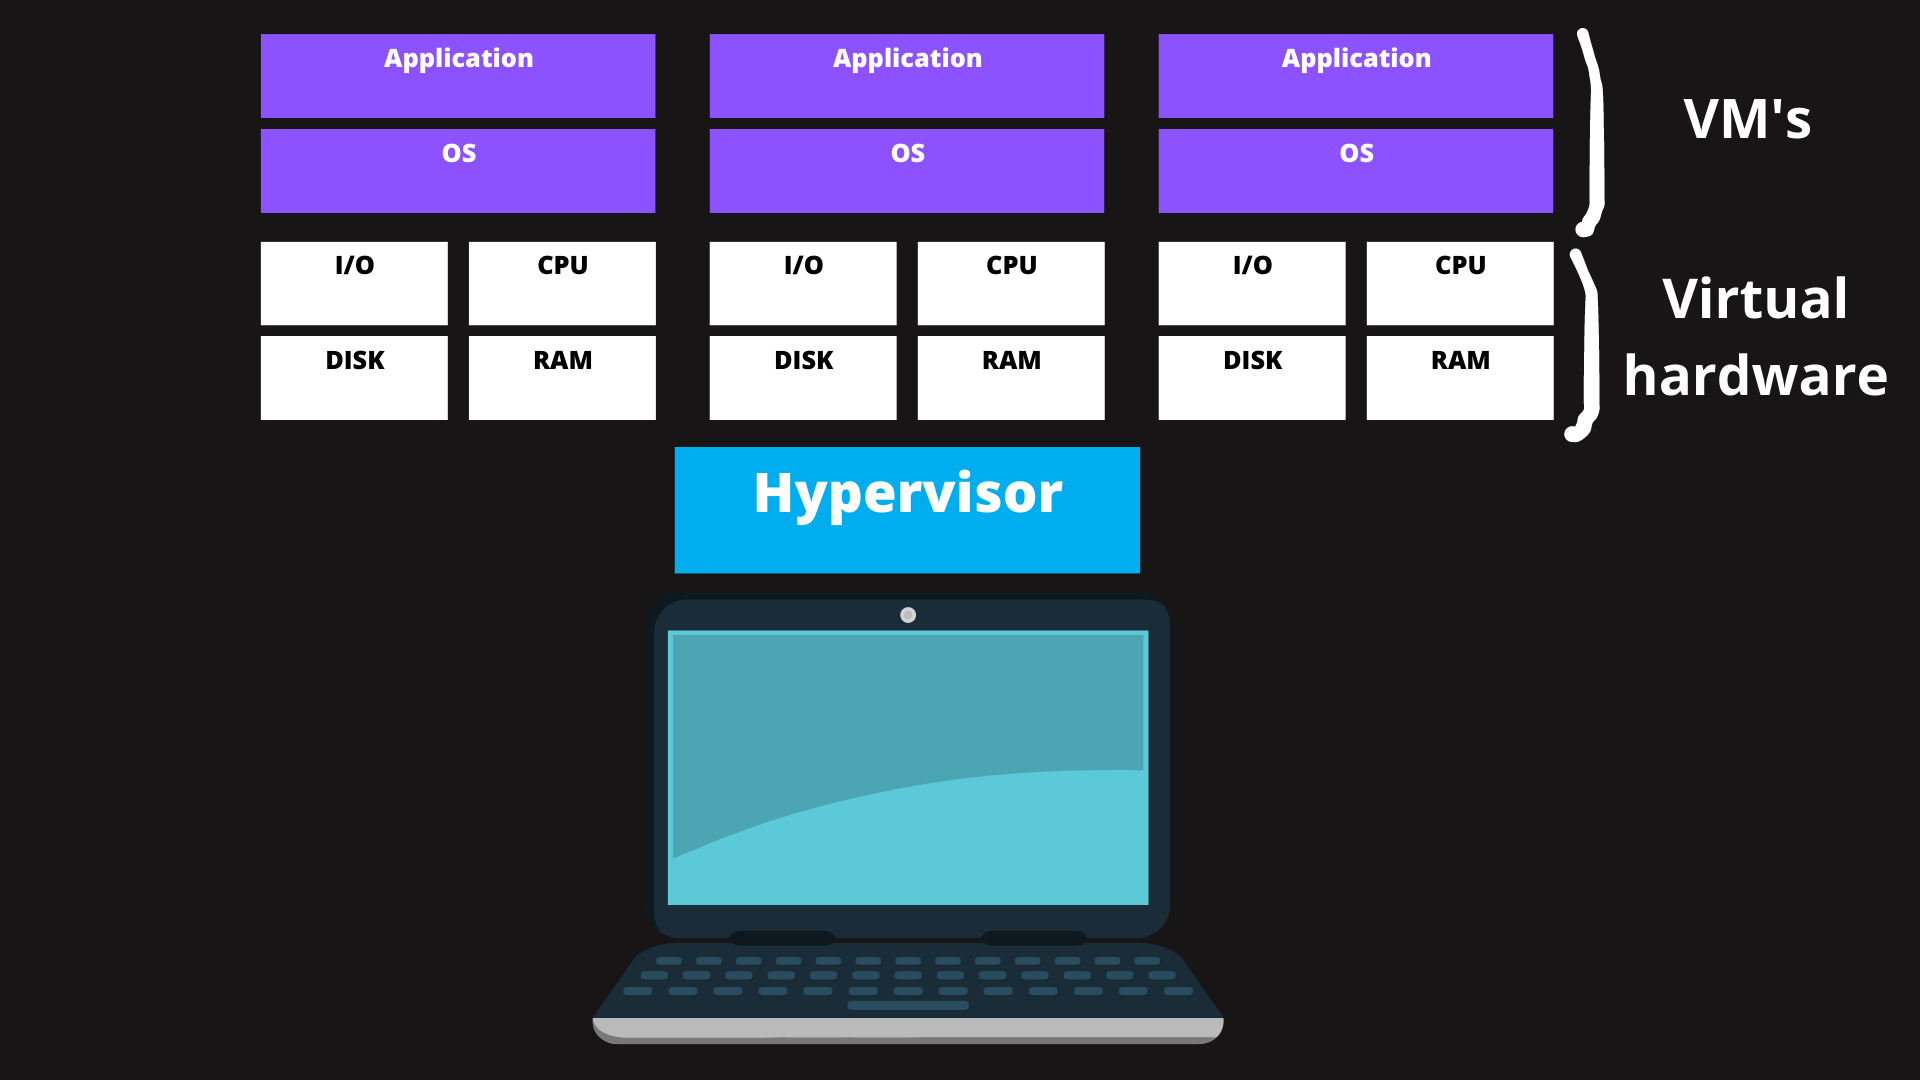
A hypervisor is a tool that lets you run multiple operating systems on one computer at the same time, by splitting the computer's resources between them. This allows you to create separate environments for different tasks, without needing to buy multiple computers.
Containers
A container is a lightweight and portable software package that contains all the necessary code, libraries, and dependencies required to run an application or service. Containers use a form of operating system-level virtualization that allows multiple isolated applications to run on the same operating system, without the need for a separate virtual machine for each application.
you might conclude form the definitions above that containers and VMs are the same thing but in reality they are not . You might say : then what are the key differences between them? , and i gladly say : will discover them in the this next section
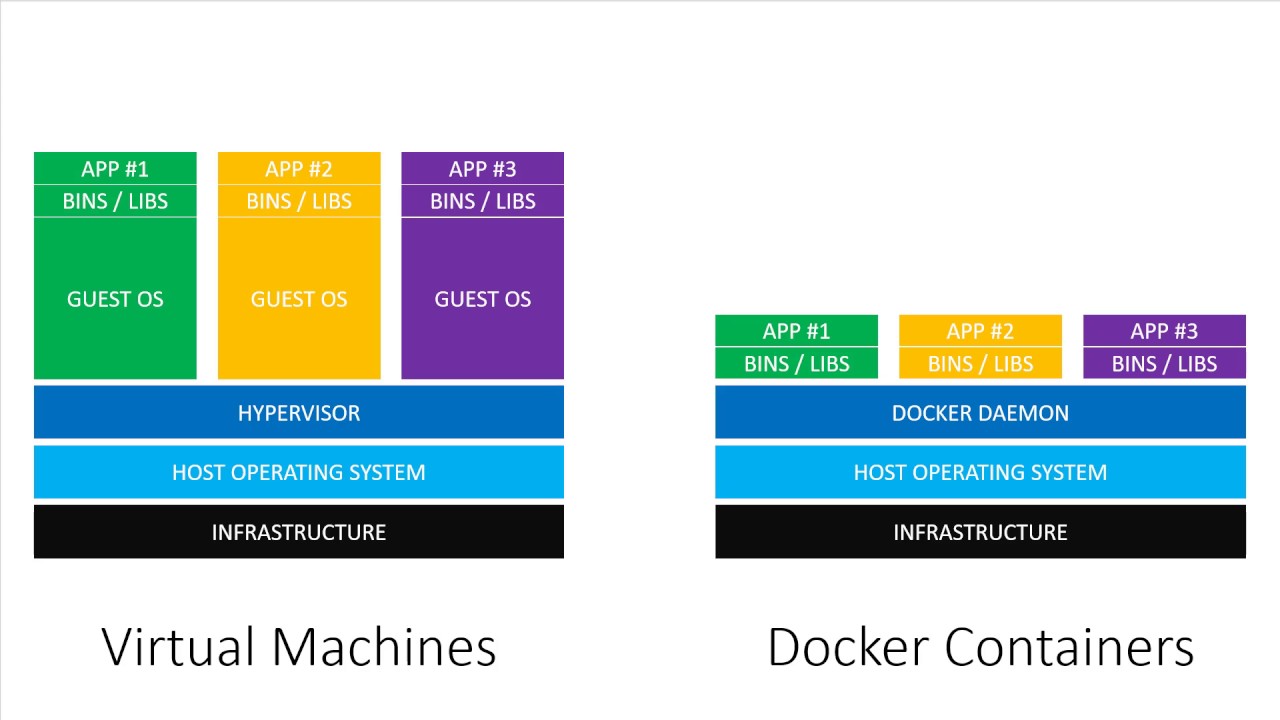
The difference between Containers and VM
The key differentiator between containers and virtual machines is that VMs require a hypervisor layer to run and each VM needs its own full-fledged operating system, which consumes more resources than containers.
Containers share the host machine's operating system and kernel, reducing the need for additional resources.
Docker
Docker is a free software that developers use to build, run, and manage containers, which are like lightweight and portable packages for their applications.
Docker Objects
Docker Image
A Docker image serves as a blueprint for creating a container that can run on the Docker platform. It's a pre-configured package that includes a set of instructions on how to set up the environment and dependencies needed to run a particular application. The image itself is read-only, meaning that it cannot be modified once it has been created.
Docker Container
Docker containers are the active and running versions of Docker images. When you run a Docker image, it creates a container that contains all the necessary software and dependencies to run your application. These containers are self-contained and isolated from the host system, allowing you to run multiple containers on a single host machine without conflicts. Each container can run its own set of services and applications, and you can easily create, start, stop, or delete containers as needed.
Docker Architecture

Docker Engine
The Docker Engine is the central component of the Docker system, installed on the host machine and following a client-server architecture. It consists of three distinct parts:
- The Docker daemon, or dockerd, serves as the server component, responsible for creating and managing Docker images, containers, networks, and other resources.
- The Docker REST API enables users to interact with the Docker daemon and issue commands and instructions.
- The Docker CLI, a client-side tool, provides a command-line interface for users to interact with the Docker system and execute commands.
Docker Client
"Docker users can interact with Docker through a client. When any docker commands runs, the client sends them to dockerd daemon,
which carries them out. Docker API is used by Docker commands. Docker client can communicate with more than one daemon."
Docker registry
The Docker Registry is like a big library that stores and distributes Docker images, which are like pre-made packages for software applications. Users can upload their own images to share with others, or download images created by other people. The Registry makes it easy to find and use Dockerized applications, and is a key part of the Docker ecosystem.
Example 1
In this example, we will download the Nginx image from Docker Hub (which is a Docker registry) and use it to create a new container running Nginx.
Step 1 : Pull the image from Dockerhub
To get the Nginx image from Docker Hub, sign in and search for "nginx".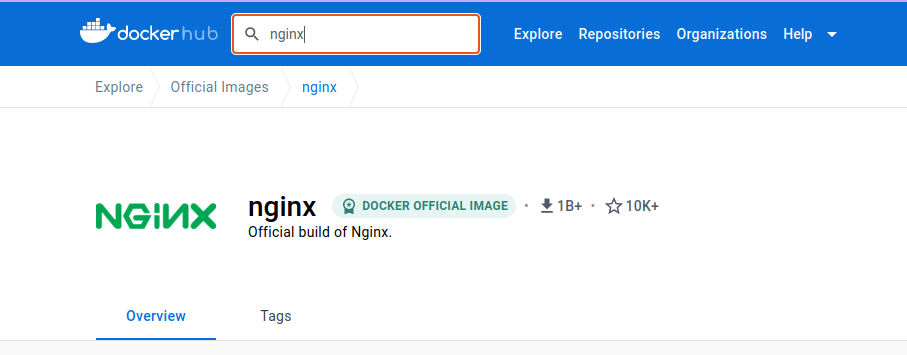
open terminal and run :
docker pull [image] //by default docker will pull the latest version

To check docker local images , run :
docker images

As you can see, the Nginx image has been successfully downloaded, and you'll notice that each Docker image has a unique ID.
Step 2 : Run Docker image
To run our docker image rundocker run [image]:[version]
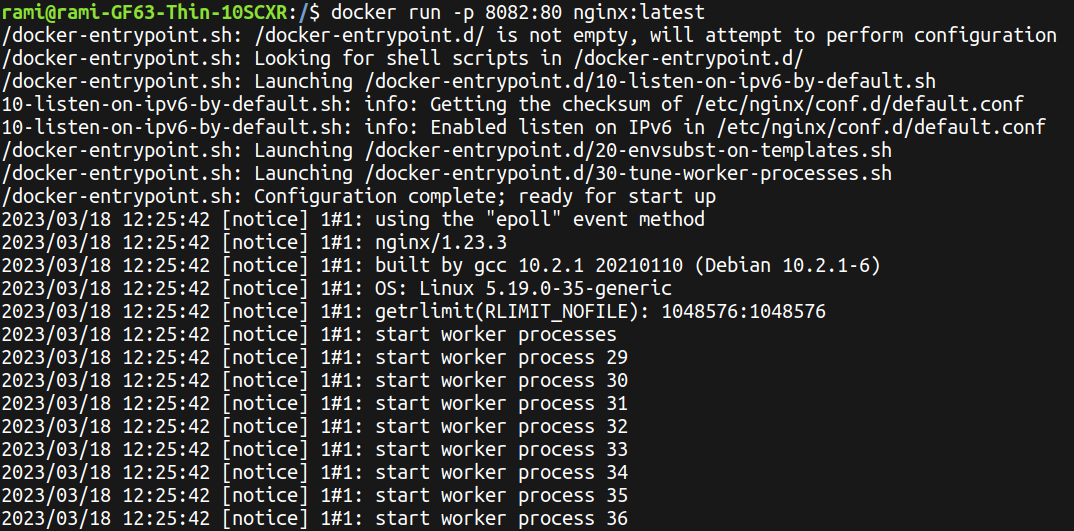
You can use the "docker run" command with the "-p" option to specify port forwarding.
Port forwarding in Docker involves redirecting network traffic from one port of the host machine to a port on a running Docker container.
This allows external applications to communicate with services running inside the container.
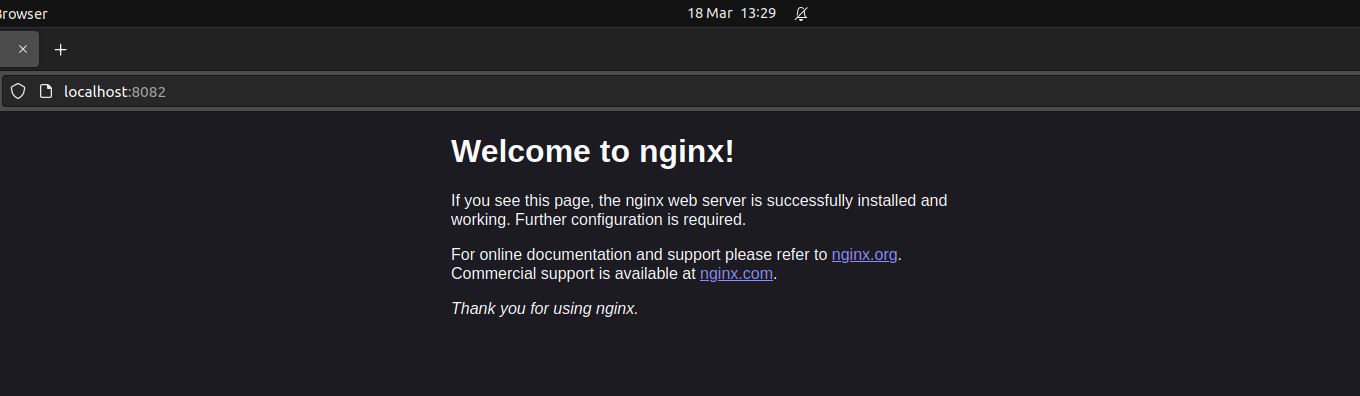
In this example, we are forwarding traffic from port 8082 on the host machine to port 80 inside the Docker container (because by default, Nginx listens to incoming HTTP connections on port 80 and port 443 for secure connections.)
You can then access the service running in the container by navigating to http://localhost:8082 in your web browser.
To check list of containers open new terminal and run :
docker ps

At any particular instance, a Docker container can be found in 6 possible states.
Created
When Docker creates containers that have never been started, it designates them as being in a "created" state. As a result, these containers consume no CPU or memory resources until they are started.
When we start a container having created a state using the docker start command, it attains the running state.
This state signifies that the processes are running in the isolated environment inside the container.
Restarting
Simply put, this state denotes that the container is under the process of restart.
Exited
This state is achieved when the process inside the container terminates. In this state, no CPU and memory are consumed by the container.
Paused
Paused is the state of a Docker container that suspends all the processes for an indefinite time.
Dead
The dead state of a Docker container means that the container is non-functioning.
This state is achieved when we try to remove the container, but it cannot be removed because some resources are still in use by an external process.
So far, we have been using pre-existing images pulled from Dockerhub. However, what if we want to create our own images? How can we achieve this?
Dockerfile
Essentially, a Dockerfile is an unformatted text file that holds the essential set of instructions needed to construct (build) a Docker image.
Dockerfile Commands
- FROM : specifies the image that will be used as the basis for the new image being created.
- RUN : used to execute a command during the image build process.
- COPY : The COPY command is simply as it sounds. It can copy a file (in the same directory as the Dockerfile) to the container.
- CMD : specifies the instruction that is to be executed when a Docker container starts. When CMD is used multiple times, only the last instance is executed.
- WORKDIR : used to define the working directory of a Docker container .
FROM [image:version]
RUN [COMMAND]
COPY [host directory] [container working directory]
CMD [COMMAND1,COMMAND2]
These are the basic Dockerfile commands. There are multiple other commands that can be used, which can be found in the official Docker documentation
Dockerfile:
FROM [image:version]
WORKDIR /[directory]
COPY [host directory] [container working directory]
RUN [COMMAND]
CMD [COMMAND1,COMMAND2]
WORKDIR /[directory]
COPY [host directory] [container working directory]
RUN [COMMAND]
CMD [COMMAND1,COMMAND2]
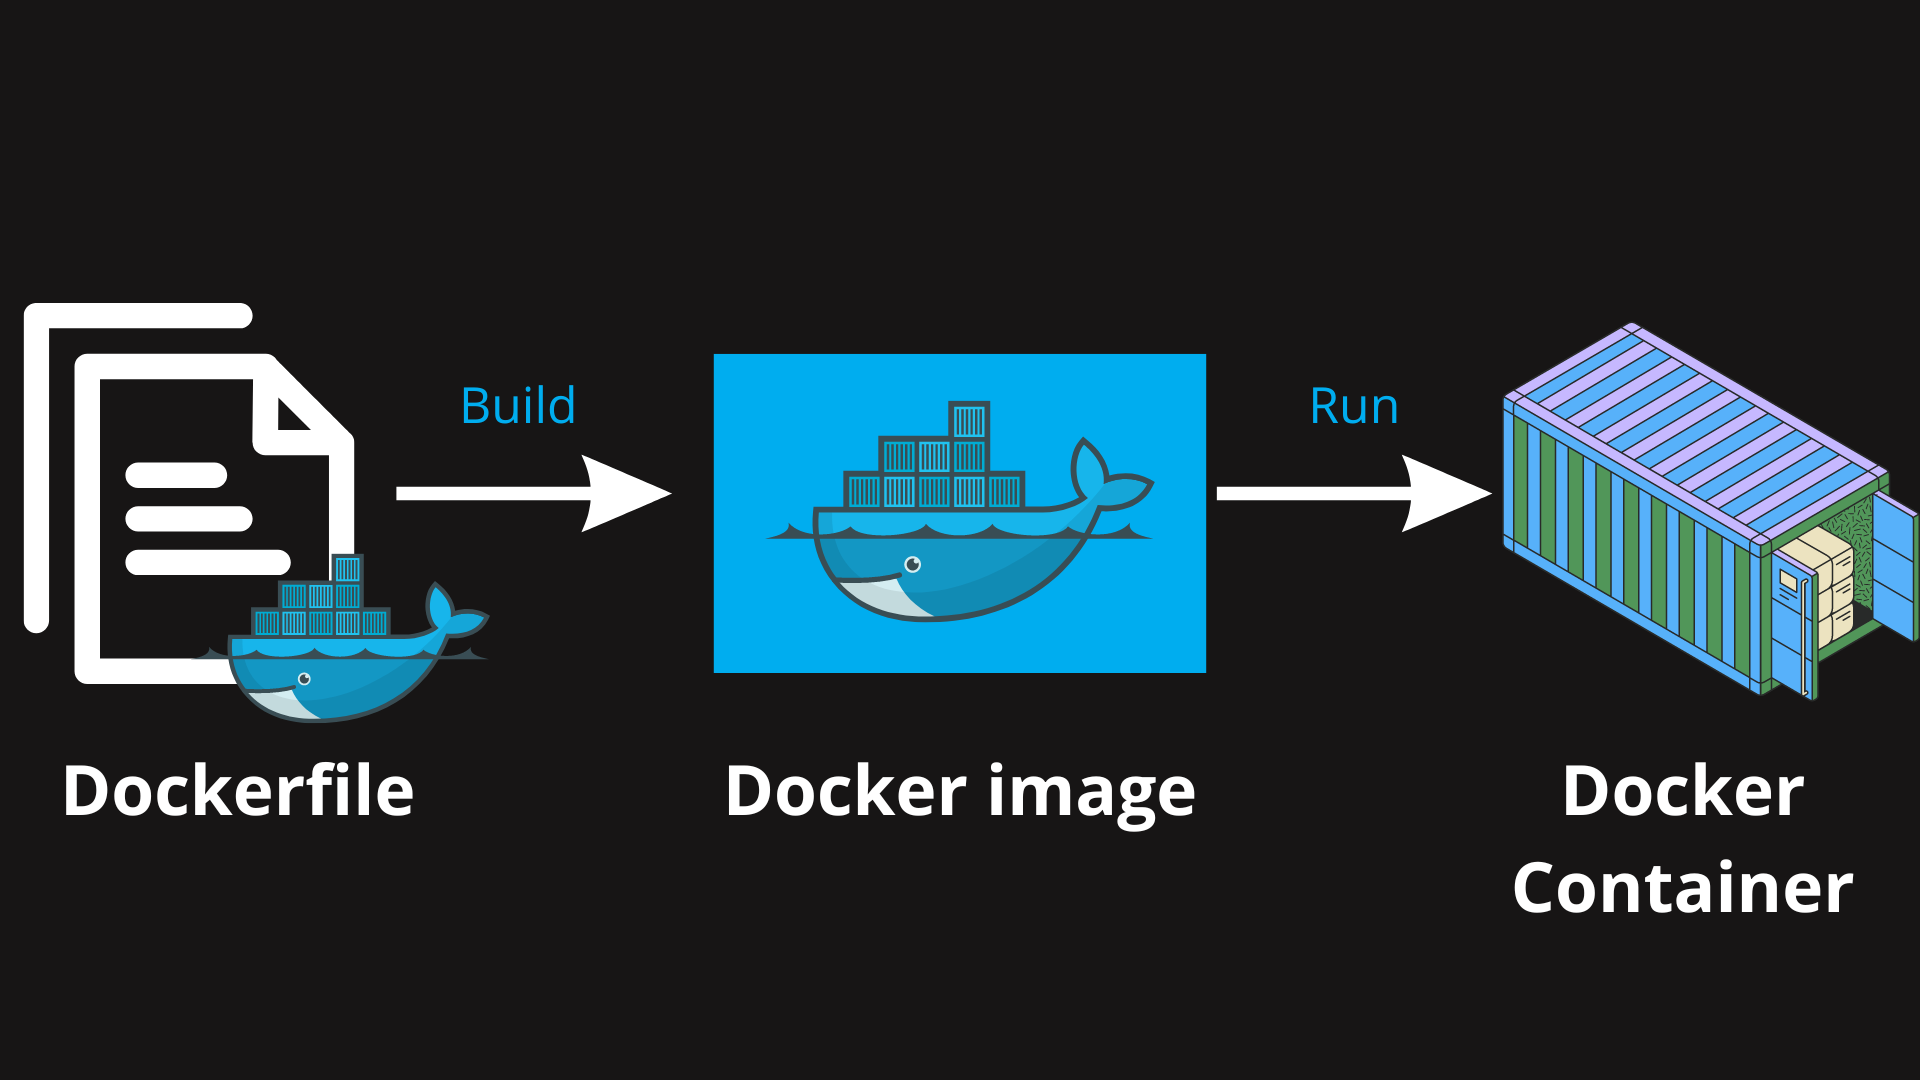
To summarize, Docker images can be built using Dockerfiles, which are sets of instructions that specify how to build the image.
Once an image has been created, it can be run inside a container.
Containers are isolated and lightweight, allowing them to be deployed in any environment
Example 2
In this example, we will be using Docker to create a NodeJS image, build it with the necessary dependencies and configurations, run it within a containerized environment, and finally push it to a Docker registry .
Step 1 : Create NodeJS application
Here's the file structure of our NodeJS application :
📂myapp
┣ 📂node_modules
┣ 📜server.js
┣ 📜package-lock.json
┗ 📜package.json
┣ 📂node_modules
┣ 📜server.js
┣ 📜package-lock.json
┗ 📜package.json
The node_modules directory contains all the packages and dependencies required by the project, along with their own dependencies.
package.json is a file used by Node.js-based projects to specify project information, configuration details, and dependencies.
server.js will contain the code below, which sets up a basic web server using the Express framework. The server will listen on port 8000, and when accessed via a GET request to the root URL ("/"), it will send the message "Hello World" as a response.
const express = require('express')
const app = express();
app.get("/", (req, res ) => {
res.send("Hello World");
});
app.listen(8000,()=>{
console.log("Listening on port 8000 ! ")
});
const app = express();
app.get("/", (req, res ) => {
res.send("Hello World");
});
app.listen(8000,()=>{
console.log("Listening on port 8000 ! ")
});
Don't worry if you don't fully understand this code
Step 2 : Create Dockerfile
First you need to create new file with name Dockerfile
📂myapp
┣ 📂node_modules
┣ 📜server.js
┣ 📜package-lock.json
┣ 🐳Dockerfile
┗ 📜package.json
┣ 📂node_modules
┣ 📜server.js
┣ 📜package-lock.json
┣ 🐳Dockerfile
┗ 📜package.json
We will start with a Node base image, which will be pulled from Docker Hub.
FROM node:alpine
Note that using the Alpine version in Docker can help reduce the size of Docker images, which can speed up image downloads, improve scalability, and reduce storage requirements.
Then we will specify /app as the working directory inside our container.
WORKDIR /app
We will copy the contents of the current directory into the container's working directory, which is /app.
COPY . .
Run npm install during the image build process to all the dependencies .
RUN npm install
And finally execute node app.js the container starts
CMD ["node","server.js"]
So we will obtain this dockerfile :
FROM node:alpine
WORKDIR /app
COPY . .
RUN npm install
CMD ["node","server.js"]
WORKDIR /app
COPY . .
RUN npm install
CMD ["node","server.js"]
Before building our image, it's important to note that certain files are not necessary in the final container image. For instance, the Dockerfile and node_modules directory are only required during the build process and can be excluded. Furthermore, since the application's dependencies are already listed in the package.json file, there's no need to include the actual node_modules directory in the container. Instead, we can use the npm install command and the package.json file to install the dependencies during the container build process.
To exclude certain files and directories from being copied into the container during the build process, we can create a .dockerignore file in the project directory.
📂myapp
┣ 📂node_modules
┣ 📜server.js
┣ 📜package-lock.json
┣ 🐳.dockerignore
┣ 🐳Dockerfile
┗ 📜package.json
┣ 📂node_modules
┣ 📜server.js
┣ 📜package-lock.json
┣ 🐳.dockerignore
┣ 🐳Dockerfile
┗ 📜package.json
Inside .dockeringore file
Dockerfile
node_modules
.dockerignore
node_modules
.dockerignore
Step 3 : Build Docker image
To build a Docker image from a Dockerfile , we will use this command :
docker build [OPTIONS] PATH_DOCKERFILE
This command takes several options and arguments that can be used to customize the build process. For example, we can use the -t option to specify a custom name and tag for the resulting image.
docker build -t myapp . // . : current directory
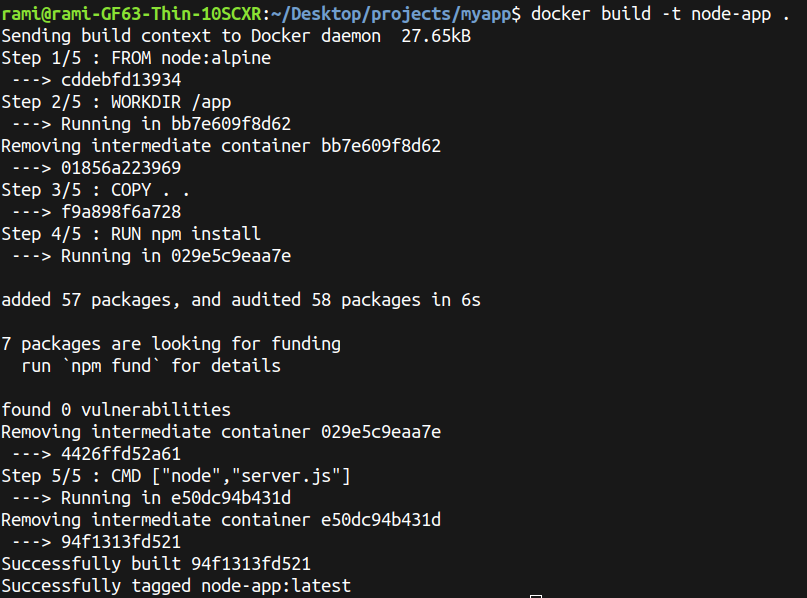
Notice that when building a Docker image from a Dockerfile, the image is built step by step, with each step being cached. This means that the next time we build the image, it will be much faster as long as the same steps are not modified.
We can check if the node-app image has been added to the list of local images

Step 4 : Run the Container
To start our container, we need to execute this command
docker run image-name:version
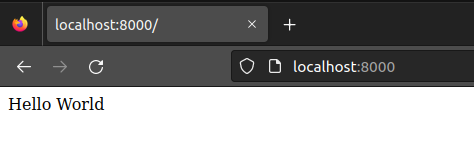
docker run -p 8000:8000 node-app:latest
Our container appears to be operating without any issues.

Now to stop our container open a new terminal and run :
docker stop [CONTAINER_ID]
Step 4: Pushing the Image to Docker Hub
In this final step, we will push our built image to Docker Hub. To do this, we need to log in and create a new repository.
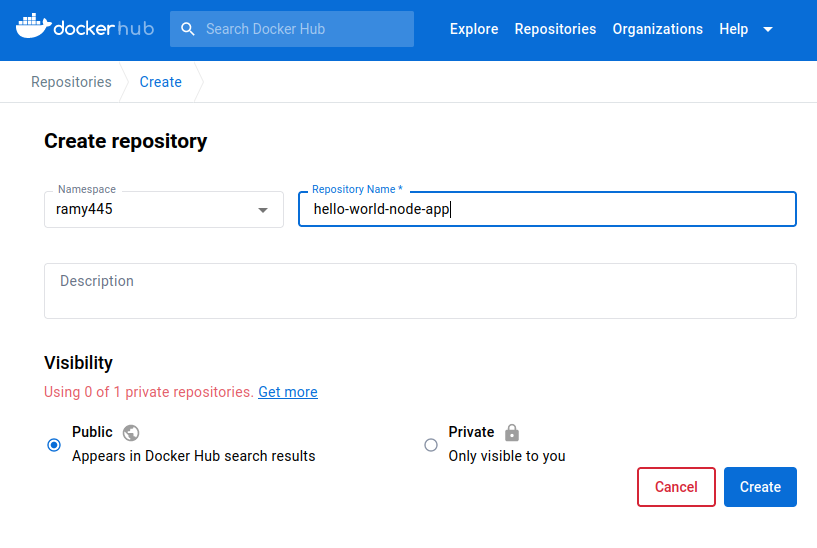
To push our image to Docker Hub, we need to rename the image using this format: username/repository-name:tagname.
to create a new tag for an existing image run :
docker image tag SOURCE_IMAGE[:TAG] TARGET_IMAGE[:TAG]

Now it is finally time to push it to a Docker registry (Docker Hub) , using this command
docker push [OPTIONS] NAME[:TAG]
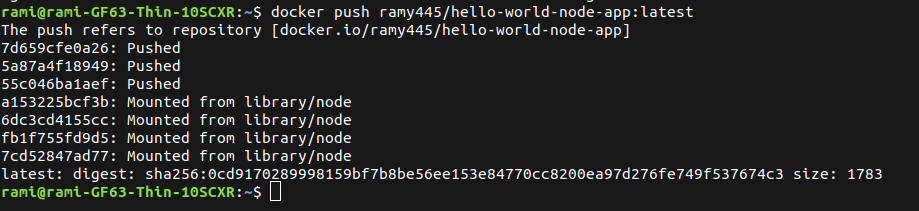
As you can see, our image has been successfully pushed to Dockerhub
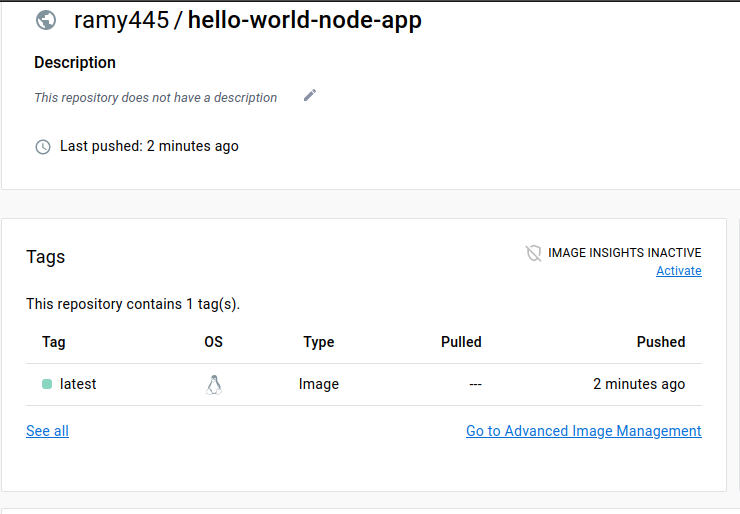
Now as long as you have Docker installed on your machine, you can download this image and test it on your local environment by running
docker pull ramy445/hello-world-node-app:latest
In this article, we discussed the concept of containerization and its benefits, followed by an introduction to Docker - a popular containerization platform. We explored Docker's architecture and its different objects, such as containers, images, and registries. Additionally, we learned how to create our own Docker image by writing a Dockerfile and how to run it using the Docker CLI.
We also covered the process of pushing our Docker image to a Docker registry, which is useful for sharing our images with others
While we've covered a lot of ground, there is much more to learn about Docker, including namespaces, Docker networks, volumes, and many other features that can help us build and deploy containerized applications more efficiently and securely."
And finally, I want to say that I hope this article was helpful and comprehensive.